A clamp should make your next step easier to control, whether you are drilling a board or assembling a small box. The useful question is not how hard you can squeeze the handle, but what movement you need to prevent and where the work needs support.
You can start with a few clamps and learn their limits before building a wall of them. A dry rehearsal with the actual parts usually tells you more than choosing the highest force number on a package.
Separate holding from joining
When you clamp a board to a bench for drilling, you are trying to keep the board from shifting during the operation. When you clamp a glue joint, you are trying to keep prepared surfaces aligned under the adhesive’s specified conditions.
Those jobs may use similar-looking tools, but the setup is different. A clamp holding a narrow strip down to a bench does not automatically keep two pieces aligned along a long seam.
Read the clamp’s intended uses and the instructions for the operation you are doing. BESSEY describes its clamps as temporary workholding devices and warns against using them for lifting, pulling, transportation, or permanent installation.
If the task includes supporting a person, raising a load, securing cargo, or making a permanent attachment, stop treating it as an ordinary bench-clamp problem. Choose equipment designed for that job rather than adapting a familiar tool.
Recognize the shape that solves your problem
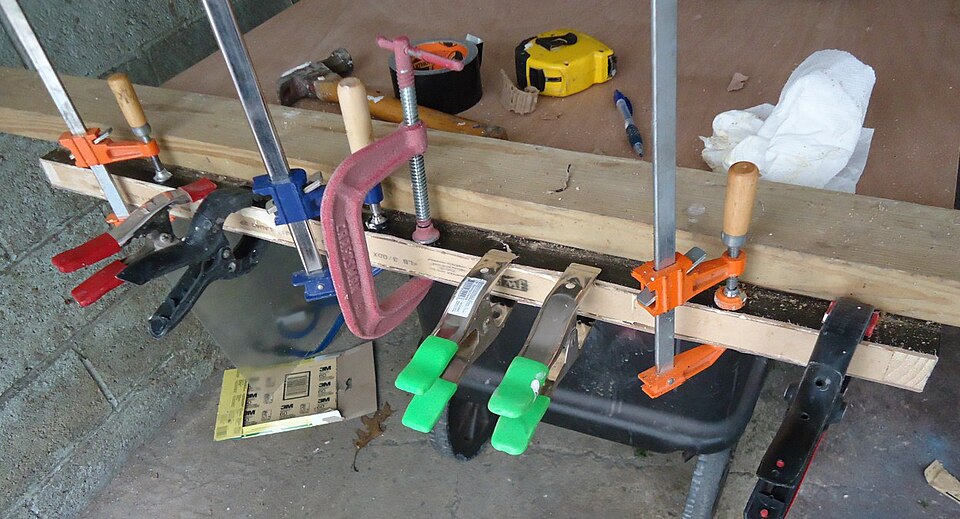
A bar clamp has jaws arranged along a bar, so you can adjust the opening to span a workpiece. A trigger-operated version can be convenient when you need a free hand to position a part before applying pressure.
A screw-operated clamp gives you a different way to approach and adjust the contact. A compact C-shaped clamp can fit some tight arrangements, but its available opening and reach must still match the material.
A spring clamp can temporarily hold light pieces in position, while a band-style clamp can surround a suitable assembly. Neither description tells you its actual capacity, permitted use, or whether it will keep your particular joint aligned.
Look at the path from the handle to the jaw, not just the overall length. The tool needs to fit around the object without the frame, bar, or handle interfering with the bench or the next tool.
Check opening and reach separately
The opening is the gap available between the contact surfaces, while the reach determines how far inward those surfaces can contact the work. You can have plenty of opening and still be unable to reach the spot you need.
For example, imagine holding a small board to the middle of a wide tabletop. A long clamp may span the board’s thickness, yet a shallow jaw cannot reach past the edge trim to the intended contact point.
BESSEY’s selection guidance asks you to consider opening, throat depth, clamping force, and physical size together. Use the exact manufacturer’s information for your clamp rather than transferring a similar tool’s rating.
Bring a simple sketch or a cardboard mockup to your planning session if the space is awkward. Mark the contact point and everything the frame must pass around, including aprons, braces, and already-installed hardware.
Make contact without damaging the surface
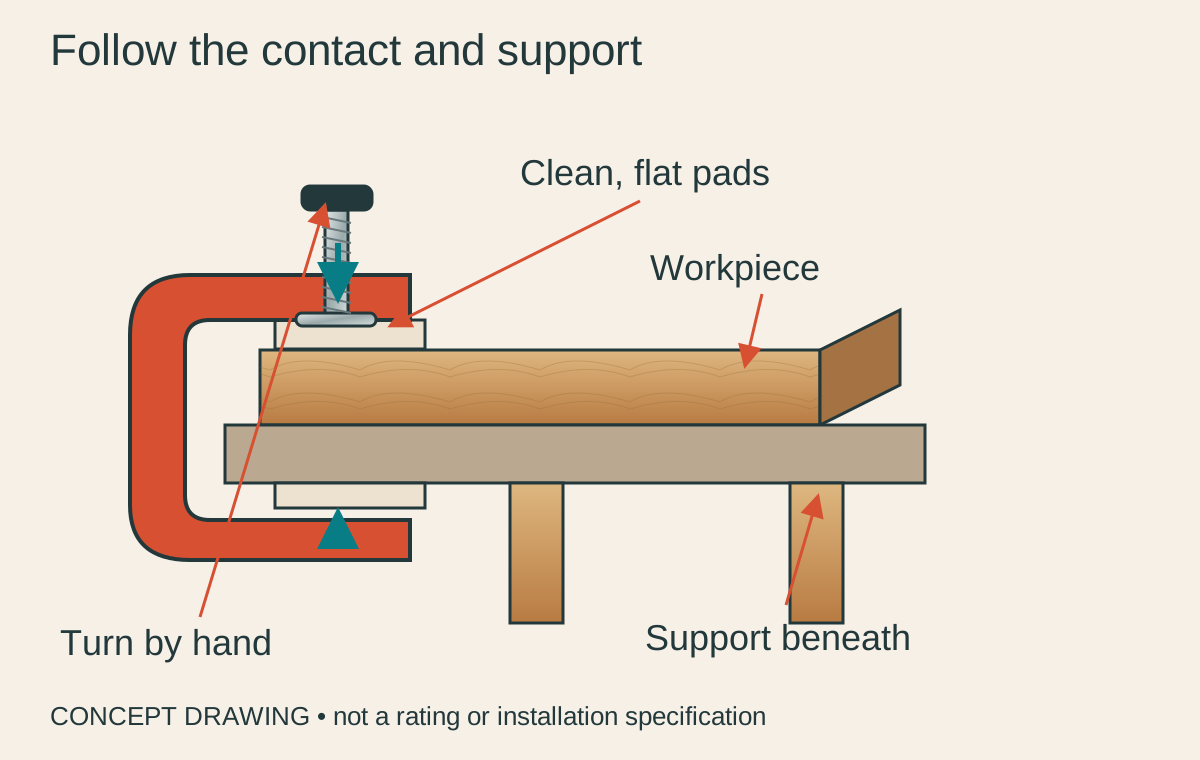
Inspect the pads and jaws before you clamp a finished face. A loose chip or dried adhesive lump can turn a broad-looking pad into a tiny pressure point.
Use suitable protective pads or clean sacrificial material when the setup calls for them. Make sure the added layers stay put and leave enough opening, rather than stacking slippery scraps until the jaws barely catch.
A wide contact piece can help you distribute pressure across a small assembly, but it must actually sit flat. If it rocks on a raised feature, you may press the wrong area while the visible joint remains loose.
Test any pad arrangement on an offcut or hidden area when surface appearance matters. Soft wood, veneer, paint, and an unfinished board do not respond identically, so a successful previous project is only a starting point.
Support the part before asking the clamp to hold it
Put the work on a stable surface in the position the operation requires. A clamp should not be the only thing preventing a large unsupported section from tipping or falling.
Try positioning a loose offcut where you expect a cut or drilling operation to finish, with the tool disconnected. Ask what will happen to every part when the operation is complete, including the piece that becomes separate.
Keep jaws, bars, and handles out of the tool’s intended path. A clamp placed exactly where a drill must descend is a planning issue to fix before starting, not a reason to loosen the work midway through the hole.
Make sure your hands have a useful place to go as well. If operating a clamp would put your fingers between shifting parts, reset the arrangement while everything is still loose and controllable.
Rehearse a small assembly without adhesive
For a simple picture-frame-sized assembly, arrange the parts and identify the faces that should remain flush. Number or lightly mark the mating pieces in a way that will not show in the finished project.
Place the clamps without fully tightening them, then check whether the corners and edges are where you want them. Look from more than one direction; a joint can appear closed from above while one piece is tilted.
Practice the order in which you will bring the clamps into contact. You want a sequence you can repeat without hunting for a missing pad or reaching across an unstable assembly.
If the joint only closes when you aggressively tighten one handle, take it apart and investigate the fit. BESSEY specifically cautions that clamps should maintain pressure between fitted surfaces, rather than force poor-fitting pieces together.
Follow the adhesive manufacturer’s instructions for preparation, working time, pressure, and time before removing clamps. There is no single waiting period that covers wood glue, construction adhesive, and every temperature in your shop.
Know what enough looks like
During a dry fit, watch the assembly as you increase pressure gradually by hand. Stop and reset if parts slide, bow, twist, or lose alignment instead of becoming more secure.
Do not add a pipe to the handle or use another tool for extra force unless that exact clamp is specifically designed for it. A stubborn joint is information about the setup, not an invitation to defeat the handle’s intended use.
Check the underside and far edge before you commit to the operation. You might find a pad touching the bench instead of the work, or a bar that has trapped a cable beneath the assembly.
For drilling, confirm the work is held in the manner the drill’s instructions require and that the backing arrangement suits the hole. For a glue-up, return to alignment and the adhesive instructions before deciding you are finished.
Release, inspect, and store with the next job in mind
Support the work before releasing pressure, especially if a clamp is holding a piece vertically. Loosen in a controlled sequence so the final clamp does not suddenly inherit an awkward load.
Clean the tool as its manufacturer directs and inspect it for damage before putting it away. Missing pads, bent parts, or a mechanism that will not hold properly are reasons to remove it from use.
Store clamps where they cannot fall onto your work or block the route around the bench. Keep the sizes you use together easy to identify so your next dry fit starts with a matching, serviceable set.
As you gain experience, buy a new clamp to solve a specific access or support problem you have encountered. That gives every addition a job and keeps you focused on a secure assembly rather than a large collection.
Take a photo of a successful dry fit before you dismantle it for adhesive. It can remind you which pad went where, but recheck the actual contact and alignment rather than treating the photo as proof that a rebuilt setup is secure.
Keep notes about access problems, too, because the awkward clamp position is often the most useful thing to improve next time.