Start with the job and the tool’s identity
Borrowing a drill for one afternoon can make more sense than buying a kit you rarely use. A used hand tool can also be useful, provided you can identify it, inspect it, and understand what still needs checking before it goes near your project.
A bargain price doesn’t tell you whether a tool suits the task or whether someone has changed an important part. Treat the handover as a short information gathering session, with the tool disconnected from its power source while you examine it.
Write down the work you actually intend to do, including the material, accessory, and working position. This keeps a convenient loan from quietly becoming permission to attempt a job that needs different equipment or experience.

Photograph the model label before anything else
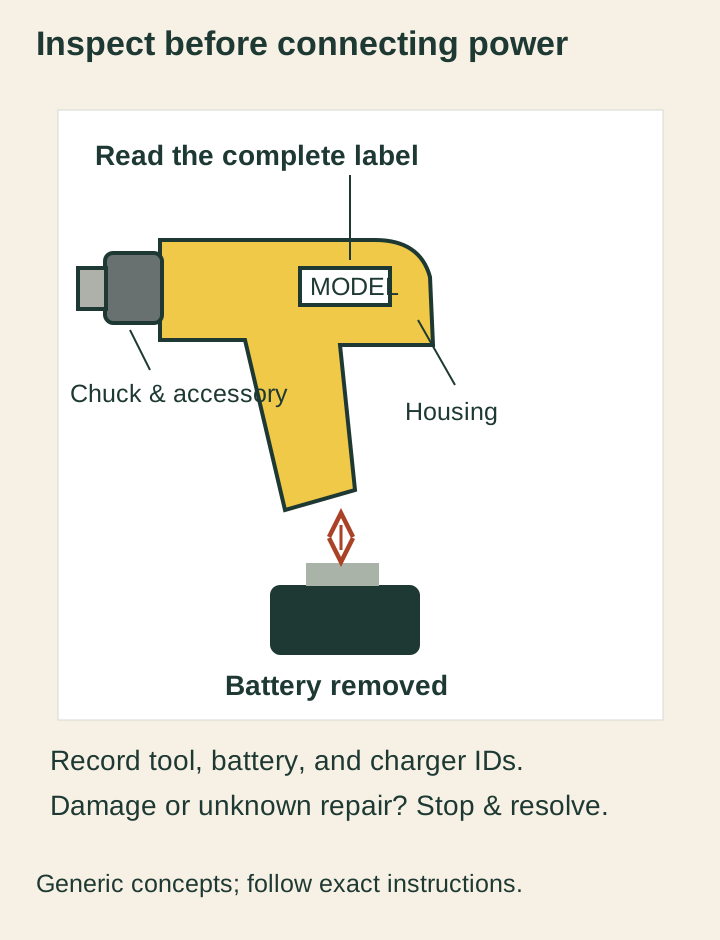
Look for the manufacturer, complete model number, type or revision, and any serial or date information the maker uses. Photograph the label clearly enough to read later, since a nearly identical name can lead you to the wrong instructions or replacement part.
Ask the owner for the manual, then compare its model identification with the tool in your hands. If the label is missing or unreadable, you may be unable to verify the instructions, accessories, or recall status with enough confidence to proceed.
For a cordless tool, record the battery and charger separately rather than treating them as one anonymous kit. A battery that physically slides onto a tool is not proof that the combination is approved, and an improvised adapter creates another unanswered compatibility question.
Check recall information by exact identification
Use the CPSC recall search and the manufacturer’s own recall information before deciding that a used tool is ready for service. Compare the model and any affected serial or date ranges rather than matching a photograph alone.
CPSC’s reseller guidance makes recall checks part of screening secondhand consumer products. A clear search result is useful evidence about the specific recall you checked, but it isn’t a certificate that every part of the tool is sound.
If an applicable recall appears, follow that recall’s current instructions and remedy process. Don’t assume a seller’s repair, a missing warning label, or a reassuring demonstration satisfies the manufacturer’s specified remedy.
Separate cosmetic wear from unresolved damage
You can expect scratches on a working tool, but you still need to understand what caused them. A scuffed housing is a different question from a crack around a handle attachment, a distorted base, or a broken latch that should retain an accessory.
Look at the whole tool before focusing on the shiny working end. Follow the housing seams, handle, base, fasteners, labels, and vents, watching for missing screws, unusual gaps, heavy corrosion, or parts that appear poorly matched.
Don’t cover a crack with tape so you can finish today’s job. Set the tool aside and have the manufacturer or an appropriate service provider assess uncertain damage, especially around structural parts, insulation, guards, or battery connections.
Examine the working parts without power
A hand tool gives you useful clues when you examine its contact surfaces. Check a screwdriver tip for rounded edges, a socket for cracks or a distorted opening, and plier jaws for damage that prevents their intended grip.
Operate movable parts by hand only where the instructions allow it and the tool is safely isolated. A sticky adjustment or loose joint is a reason to investigate, rather than a challenge to overcome with a longer handle or more force.
For a drill, examine the chuck and the condition of the accessory before use. You aren’t proving spindle accuracy by looking at the empty chuck, and you shouldn’t install a visibly bent bit just to see how badly it wobbles.
Treat cords, plugs, batteries, and chargers as their own checks
A corded tool needs more than an intact outer housing. Look along the accessible cord and plug for damage, exposed conductors, improvised connections, or alterations, and leave uncertain electrical repairs to a qualified service provider.
A battery deserves the same deliberate pause before you insert or charge it. Cracks, swelling, leakage, damaged contacts, or evidence of overheating call for the maker’s damage and disposal instructions, not a trial run to see whether it still holds a charge.
Check that the charger is the specified model and that its supply requirements match your location. Ask where the equipment has been stored, since a tool that arrived dry today may still have an unresolved history of water exposure or excessive heat.
Account for guards and accessories
Compare the actual equipment with the manual’s parts illustrations and required safeguards. A missing guard, side handle, fence, protective cover, or retaining component can be more consequential than a missing carrying case.
Check the accessory’s intended material, size, mounting arrangement, and any required operating limits against the tool instructions. Sharing a hole diameter or fitting into a chuck does not establish that an accessory is suitable for the machine or the job.
If you cannot identify an installed accessory, remove it according to the instructions and resolve that uncertainty first. Borrowing an unknown blade along with a familiar tool does not make the blade’s application or condition any clearer.
Ask about the history without turning it into a guarantee
Useful questions are specific: has the tool been dropped, repaired, modified, soaked, or used with adapters? Ask who performed any repair and whether there are receipts, service records, or replaced parts you can identify.
An honest owner may simply not know the answer, particularly when the tool has changed hands before. Record that as unknown instead of converting a friendly conversation into proof that nothing has ever gone wrong.
For measuring or controlled tightening equipment, appearance tells you even less about accuracy. A torque wrench with a smooth adjustment still needs an appropriate service or calibration history before you depend on its readings for a specified connection.
Arrange a controlled demonstration only after screening
Once the identification, condition, safeguards, accessory, and instructions are resolved, arrange any demonstration in a suitable work area. Follow the exact startup procedure, with the tool supported and people clear of its moving parts and the material path.
A demonstration can reveal an obvious operating problem, but it cannot rule out hidden damage or establish every specification. Stop for unexpected movement, noise, smell, vibration, or control behavior and investigate rather than repeating the attempt at a higher setting.
If you cannot assess the equipment appropriately, choose a different loan, an established rental provider, or qualified help. You don’t have to buy the tool merely because someone has made time to show it to you.
Make the return plan part of the loan
Before borrowing, agree on the included pieces, return time, consumables, and what to do if anything seems wrong. Photograph the kit and note existing wear so both of you can distinguish a missing accessory from one that was never included.
Keep the manual and the model information with your project notes while you work. Return the tool clean according to its instructions, with its accessories accounted for and any new concern described clearly before the next person uses it.
If you’re buying, add the likely cost of missing approved parts, service, and compatible power equipment to the asking price. The useful comparison is the complete tool you can confidently use, rather than the cheapest object on the table.
Keep uncertainty visible in the decision
A useful inspection note has three columns: what you verified, what needs service, and what remains unknown. That small distinction keeps a clean appearance from turning into an unsupported conclusion about the tool’s history or accuracy.
For example, you may verify the model and matching manual while still being unable to assess an internal repair. You can then ask a precise service question or pass on the purchase without pretending the outside inspection answered everything.
You can also decide that borrowing isn’t worth coordinating for this particular job. Access to a suitable, maintained tool at the right time is the goal, and the cheapest arrangement on paper may leave you without a workable plan.