Read a tape measure in two passes: identify the whole inch, then identify the fraction beyond it. Once you recognize halves, quarters, and eighths as landmarks, the little lines become positions you can explain instead of marks you have to guess.
Start with a common US inch tape divided into sixteenths and a scrap board you can mark freely. Other tapes use different divisions or include metric and specialty scales, so confirm what is printed on your own blade before using the examples below.
Identify the scale before counting
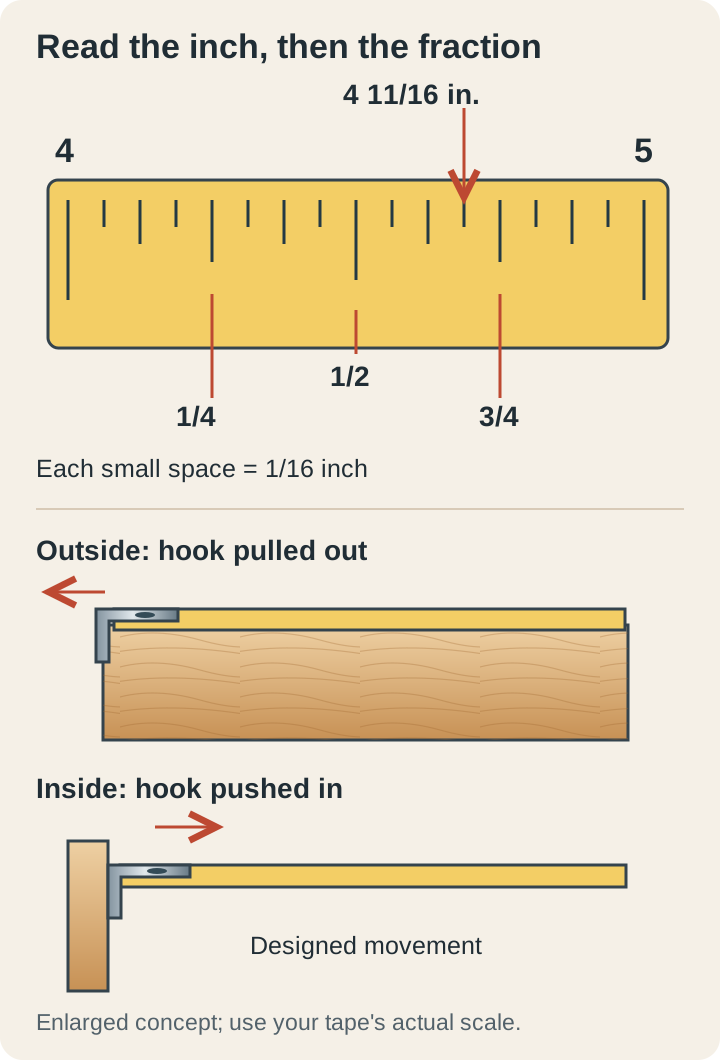
Find two neighboring whole-inch marks and count the equal spaces between them. Sixteen spaces mean each small step is one sixteenth of an inch; do not count the starting line as the first step, because you have not traveled any distance yet.
Some tapes print fraction labels, some use changing line lengths, and others add a second scale along the opposite edge. Choose one edge to read for your exercise so you do not accidentally combine an inch number from one side with a metric mark from the other.
Johnson Level’s guide describes the usual hierarchy of longer marks for larger fractions. Use that visual pattern as a clue, then verify it by counting the equal spaces on the particular tape in your hand rather than assuming every manufacturer’s graphics look identical.
Build the fractions from familiar landmarks
The midpoint of an inch is one half, which is eight sixteenths. Halfway between zero and that midpoint is one quarter, or four sixteenths, and halfway between the midpoint and the next inch is three quarters, or twelve sixteenths.
The eighths sit between those quarter-inch landmarks: one eighth, three eighths, five eighths, and seven eighths. On a sixteenth-inch tape, the shortest remaining steps often represent the odd sixteenths that fall between those larger marks.
Take a position eleven small steps beyond the four-inch line. You can count eleven sixteenths directly, or recognize that it sits one step before three quarters, which is twelve sixteenths; either route gives you four and eleven sixteenths inches.
Use the route that feels easiest to check, and say the complete measurement aloud while learning. “Four and eleven sixteenths inches” is much less ambiguous than “eleven” when you later return to a cut list or explain a mark to someone helping you.
Reduce the fraction without changing the distance
If your count lands on six sixteenths, divide both numbers by two to get three eighths. You are naming the same location with a simpler fraction, not moving the measurement or rounding it to a more convenient tick.
Try ten sixteenths as a second example: dividing numerator and denominator by two produces five eighths. Twelve sixteenths reduces to three quarters, while thirteen sixteenths stays as it is because there is no shared whole-number factor greater than one.
Keep the original count in your notes if reducing fractions slows you down while marking. A clearly written measurement that you can verify is more useful than a hurried mental shortcut that sends you to the wrong side of the half-inch line.
When adding measurements, give the fractions a shared denominator first: one quarter plus three eighths becomes two eighths plus three eighths, or five eighths. Writing that small calculation beside the cut list lets you check the arithmetic separately from the physical tape reading.
Understand what the end hook is doing
Many retractable tapes have a deliberately sliding hook to accommodate its thickness when you pull against an outside edge or push against an inside surface. Confirm the feature on your model, and do not tighten or reshape the hook simply because you notice designed movement.
For an outside measurement, seat the hook squarely over the edge and keep the tape along the intended measuring line. Debris, a rounded corner, or a hook caught on just one side can change where your measurement begins even when you read the other end correctly.
For an inside measurement, use the tape’s intended procedure and let the hook contact the reference surface properly. Do not add an assumed hook thickness from an internet example, because its compensation is part of the tool’s design rather than a universal correction you should apply yourself.
A bent hook, damaged blade, or inconsistent contact deserves investigation before you measure finished parts. Compare repeat measurements against a trustworthy reference, and replace or service a damaged tool instead of inventing a correction that you must remember for every future project.
Choose a reference edge and keep it
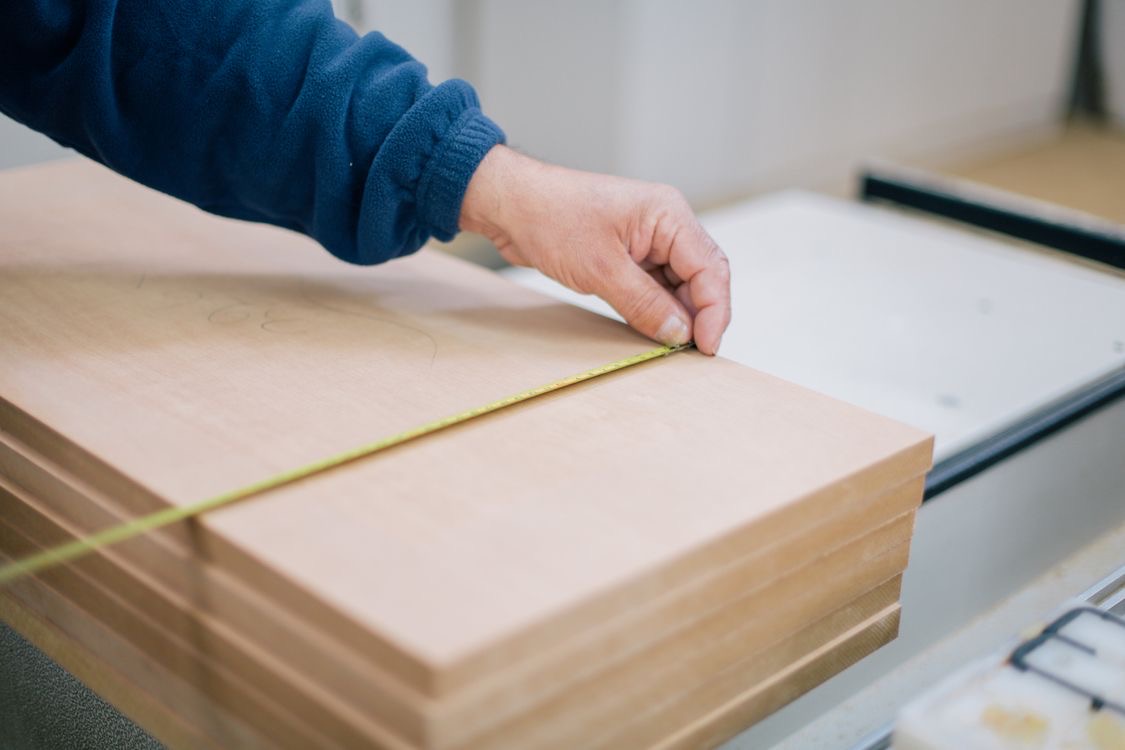
Suppose you need three hole centers positioned along a board. Label one end as your reference and measure each location from that same end, so a small error in the first mark does not become the starting point for the next one.
Write each intended distance before you mark, then put a small pencil tick at the correct side of the blade. If your pencil line becomes broad, decide which edge represents the measurement instead of leaving a dark patch that can hide several possible positions.
Extend a mark with a suitable square when the project calls for a line across the board. A tape tells you distance along its blade, but it does not make a freehand line perpendicular to an edge or verify that the edge itself is straight.
Keep units beside every number when a project combines purchased hardware and a homemade part, especially if the hardware instructions use millimeters. Convert deliberately on paper when required, and avoid rounding repeatedly between systems before you have checked the fit the assembly actually needs.
Measure awkward gaps without forcing the blade
Inside a cabinet, the tape case and a bend in the blade can make the reading hard to see. If you use a case-length method, confirm the exact reference dimension and intended use on your tape rather than adding a remembered number from a different model.
Another option for a simple opening is a clean, straight reference block of known length placed firmly against one side. Measure the remaining straight distance to the block’s exposed end, then add its verified length on paper and recheck the full setup before transferring the result.
For example, a verified ten-inch block plus a measured seventeen and three eighths inches gives twenty-seven and three eighths inches. This is a layout exercise, not a promise that every cabinet opening is square, so check the required locations separately when fitting a real part.
Subtract when you start away from zero
You may occasionally align a convenient whole-inch line with the start of a small object instead of using the hook. Write down that starting reading immediately, because the number at the far edge is then a position on the tape rather than the object’s length.
If you start at two inches and the far edge lands at seven and five eighths, subtract two to get five and five eighths inches. Mark your worksheet “start at 2” so the setup cannot quietly turn into an oversized part when you come back after an interruption.
Try a short practice session with answers
On paper, write three positions: two and three quarters, five and seven sixteenths, and eight and one eighth inches. Locate each on the blade, cover your written answer, and explain the whole-inch landmark and fraction before checking what you wrote.
Next mark those positions on scrap from a shared reference edge, lift the tape away, and remeasure. If one differs, examine the hook seating, measuring line, pencil width, and reading angle before deciding that the fraction itself was the problem.
Finally, retract the tape under control according to its instructions and put the finished practice board beside your notes. You now have visible examples you can revisit, which is a more useful skill check than memorizing a string of fraction names without ever placing a mark.